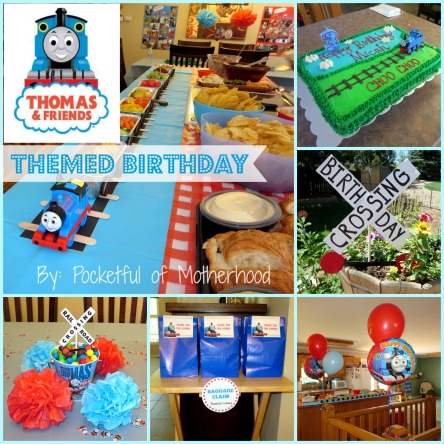
Oh my how time goes quick—I can’t believe I have a 3-year old! Last month we celebrated my son’s 3rd birthday and it was lots of fun. For his 1st birthday we did a theme based off of Eric Carle’s book “The Very Hungry Caterpillar”, for his 2nd birthday we did a Construction theme, and this time around we did a Thomas and Friends theme. Several months prior to my son’s birthday I started thinking of different themes that he might enjoy for his party. I narrowed it down to Thomas and Dr. Suess (Cat In The Hat) because he enjoys both of those things. I asked him several times which he would prefer and each time his response was the same:
“Can I have a Thomas party, and a Percy party, and a Diesel party, and a James party, and a Gordon party pleasssssssssssssse!”
So we went with the Thomas theme! 🙂
Like his past parties, this was a fun one for me to plan…
 Here’s the birthday boy himself all grown up and I’m one proud mommy!
 I looked online for invitations but my budget didn’t like the upscale prices so I decided to create my own. I used PicMonkey to create these invitations and yes it took a little time, but they were much friendlier on my budget. I printed them off as 4×6 prints at my local Costco for 14 cents an invite—super thrifty way to do invites if that’s your thing! CLICK HERE for the blank version of the invite without all the wording.
 Our guests were greeted with this colorful door sign. Again, something I made using PicMonkey.
 I also designed this Happy Birthday sign using PicMonkey—in case you can’t tell I’m a HUGE fan of PicMonkey 😉 because there’s a free version and it’s very user friendly!
 I printed each part of the sign off on card-stock. Then came the tricky part because I don’t have one of those nifty circle cutters (and I should have spaced the circles out a little more). I used a large coffee mug to trace a circle around each letter/picture and then I hand cut each circle. Then I made 2 hole punches at the top of each circle and weaved some blue ribbon through to make my sign. There are printables for this sign at the bottom of the post! You will just need some white card-stock.
 I made this birthday crossing sign with supplies I already had at home: cardboard, acrylic paint, and a wooden stick. I stuck it in one of our flowerpots in the backyard (our first year having a backyard for a birthday party so I was thrilled about that!).
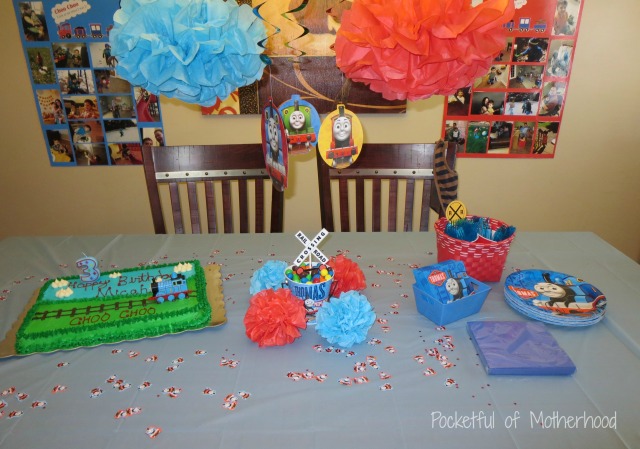 I used a light blue and red theme to decorate. I found the little railroad crossing signs on PBS’s website and I glued them onto cake pop sticks. PBS’s site has some other fun printables too. I found some of the other Thomas decor at my local party store.
 To add a little pop of color I made some red and blue poms which I hung from the chandelier and also displayed on the table. Find the tutorial for how to make them HERE. They are so fun!
 I made 2 posters of pictures from my son’s past year. I made a label for the top which said, “Choo Choo, look at me when I was 2!” I laminated them and posted them on the wall for our guests to enjoy. Great keepsakes that he will probably enjoy seeing again when he’s older ;).
 Looking around on Pinterest, I saw this cute idea for a food train and I knew I wanted to do something like it. I found several examples where people used black tape to create a train track (great idea)—but once I saw the price of black tape I decided to go a different route. I bought a piece of black poster board and used it to create the vertical part of the track. Then I used some jumbo Popsicle sticks that I already had for the horizontal bars. I used bread size foil tins for the cargo carts and I used Oreo cookies for the wheels (stuck on with peanut butter). They got filled with fruit, veggies, etc. It was a cute and organized way to display some of the food!
 A back view of the train.
 Not sure all the food was out at this point but here’s another view of the main food spread.
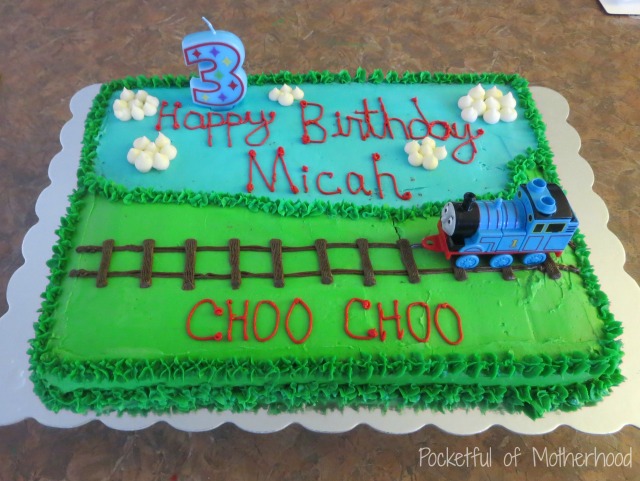 What party would be complete with out a cake?! I’m a baker at heart so I usually go the homemade cake route. My sister-in-law makes awesome cakes and she was kind enough to let me borrow some of her cake stuff so I could pull-off a cake like this. I learned from past years that’s it’s too much work to make a homemade cake and also to make a bunch of homemade party food. So I choose to make the cake and opted for things like pre-made sandwiches and fruits and veggies that I could cut up the night before. This was a more stress-free way to go—it only took me 3 years to figure that out!
 My sweet boy eagerly awaiting his cake…
 I’m not sure that I’ve ever met a kid that enjoys singing “Happy Birthday” as much as my son does. He gets so excited about this part of birthday celebrations! He clapped and yelled “Yay!!!” after we finished singing to him.
 My son is a chocolate fan so I went with a chocolate cake with a butter-cream frosting.
 For party favors I set up a baggage claim station and I found the tags for the “baggage” on Passion for Savings. There’s some more free printables there as well.
 With Daddy post-party. I’d say we had a wonderful time celebrating this special boy Chugga Chugga Choo Choo style!
Printables for Happy Birthday Sign:
Birthday Sign 1
Birthday Sign 2
Birthday Sign 3
Birthday Sign 4
Birthday Sign 5
Choo Choo
# Three
Thomas & Friends
Party Planning Tips:
- Plan Ahead! Start looking for ideas a few months ahead of time.
- Keep a running record of party ideas as you find them. Utilize places like Pinterest, other Blogs, etc. to find ideas.
- Take advantage of FREE printables. Several websites and blogs offer printables that you can download for free and print at home.
- Start making decorations a month or two in advance. This will make things a lot more stress-free closer to party time.
- Save some money by shopping for things like tablecloths and plastic ware at places like the dollar store or the $1 spot at Target.
- Make a Food Menu and be realistic. A combination of homemade food and pre-made food is a good medium.
- Prep food and hang decorations the night before the party.
- Most of all Have fun and enjoy party day!
_____

(C) 2014 Pocketful of Motherhood, All Rights Reserved.
Hi There! Did you like this? I would love for you to join me over at my new blog, Woven Beautiful – a place of nourishment for your beautiful soul filled with encouragement, devotions, crafts, healthy recipes, free printables, and more. I would love for you to stop by and connect with me there! www.wovenbeautiful.com